MANUAL for the SmartCover BT
- Connect the SmartCover BT to your device
- Add or retrieve a client
- Pick or create a saddle mask
- Record
- Report/ Protocol
1) Connect the SmartCover BT to your device
(You can find a much more detailed instruction here.)
a) Get the VeloControl ready
- put 4 batteries into the VeloControl
- switch on the VeloControl by pressing the little power button and holding it. The small light flashes red and then solid blue which indicates it's transmitting. (If you get a red light later on, it means the batteries are flat and time to change them. Remember to turn the VeloControloff at then end of your session!)
b) Connect to a computer/ tablet/ mobile phone
There are three options for this:
Connection via the local network
Use the supplied ethernet cable. Connect it with the VeloBox and then with your local area network. Access the VeloBox through a URL address through the local network by opening any browser and entering veloboxTHREE DIGIT CODE AT THE BOTTOM OF IT.local. (For example velobox560.local)
Connection directly via Ethernet
Use the supplied Ethernet cable. Connect it with the VeloBox and then directly with the Ethernet port on your computer. Access the VeloBox through a URL address through the local network by opening any browser and entering veloboxTHREE DIGIT CODE AT THE BOTTOM OF IT.local. For example velobox560.local
Wireless:
Connect the VeloBox to the computer/tablet/phone via wireless by going to the three dots on the top right →- system → WiFi → entering name and password of your network
2) Add clients - Retrieve clients
Basically: there is a help menu actually built into the software. Wherever you see a question mark symbol you can click on that and get a pop-up with additional information.
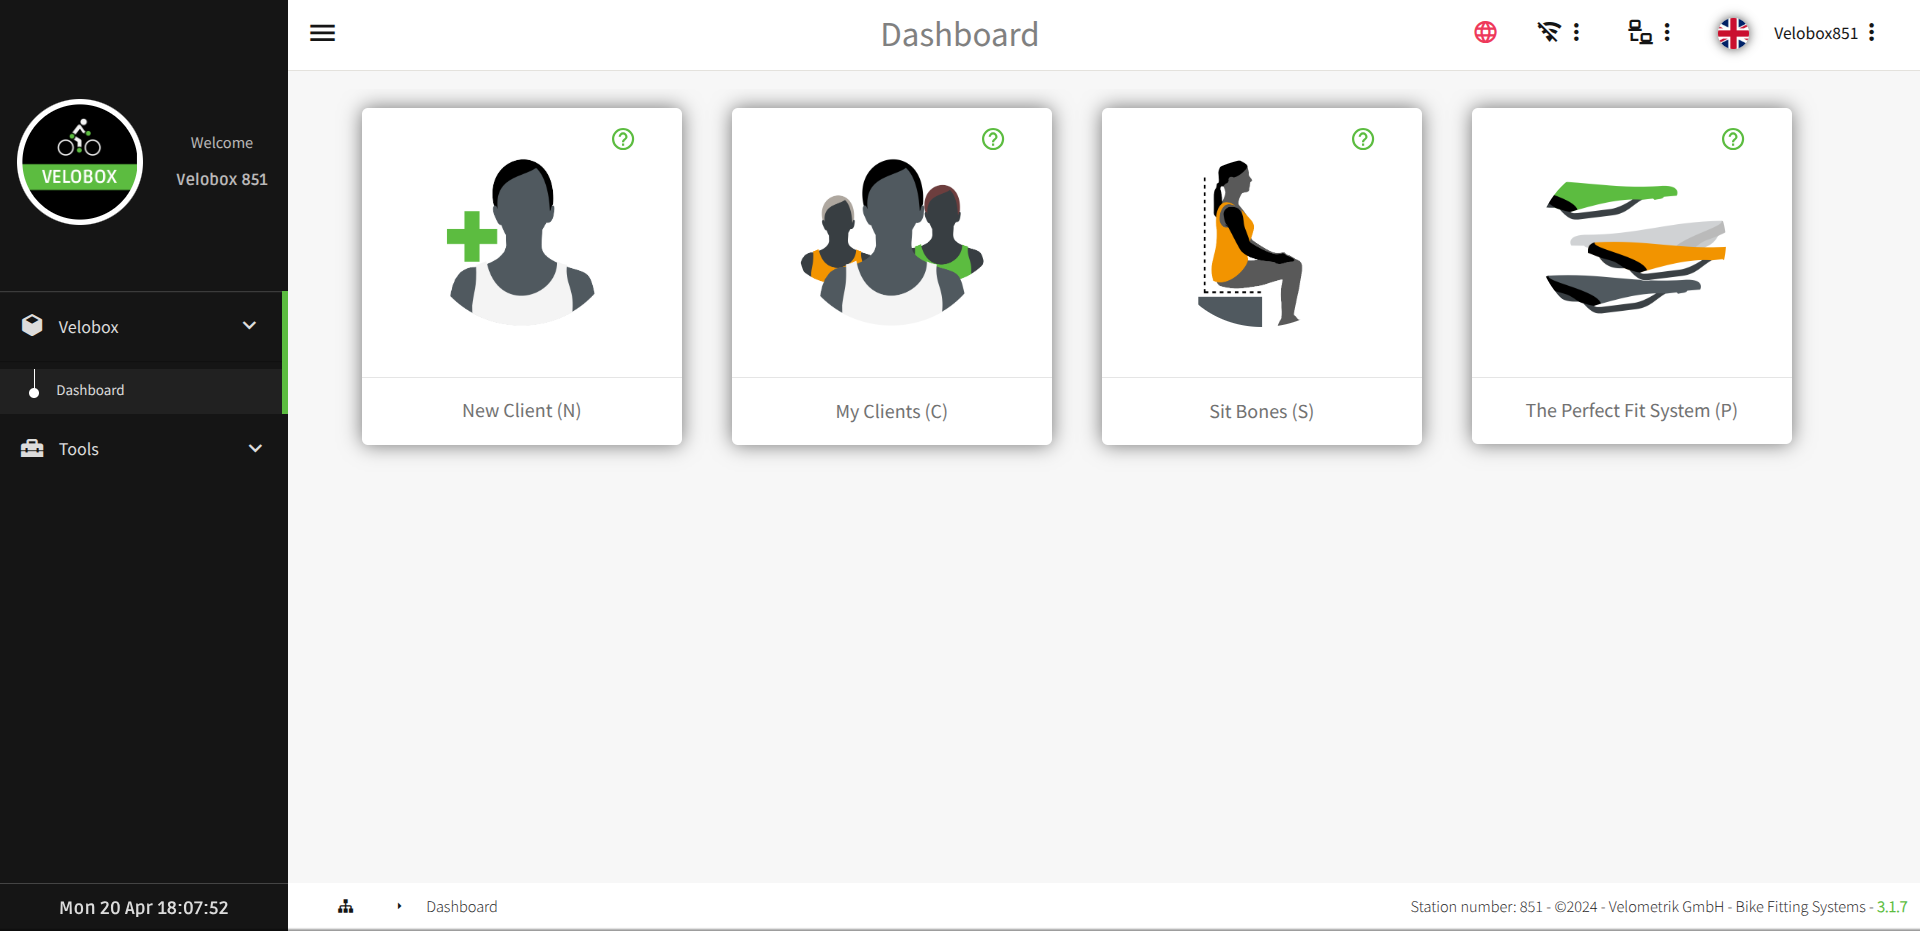
The main dashboard of the VeloBox software looks like this
You can see on the left side there's a limited number of menu items: VeloBox with Dashboard and Tools. The „tools“-section is only important if you’re working with a SmartCube.
In the middle you've got four main dialogue boxes you can choose from here. Only the first two, New Client and My Clients, will be relevant for SmartCover users. (The next two, the Sitbones and the Perfect System, will only be relevant to SmartCube users.)
In the top right corner three dots enter the menu with Reload, New Window and System. In „System“ you find 11 settings which explain themselves if you hit the green question mark which is positioned with each setting. You might for example want to change the language before you start working with the SmartCover. You can connect your VeloBox with the local WiFi in the WiFi-Setting. The green question mark coming with „Custom Protocol“ gives you a complete manual how to customize the protocol/report.
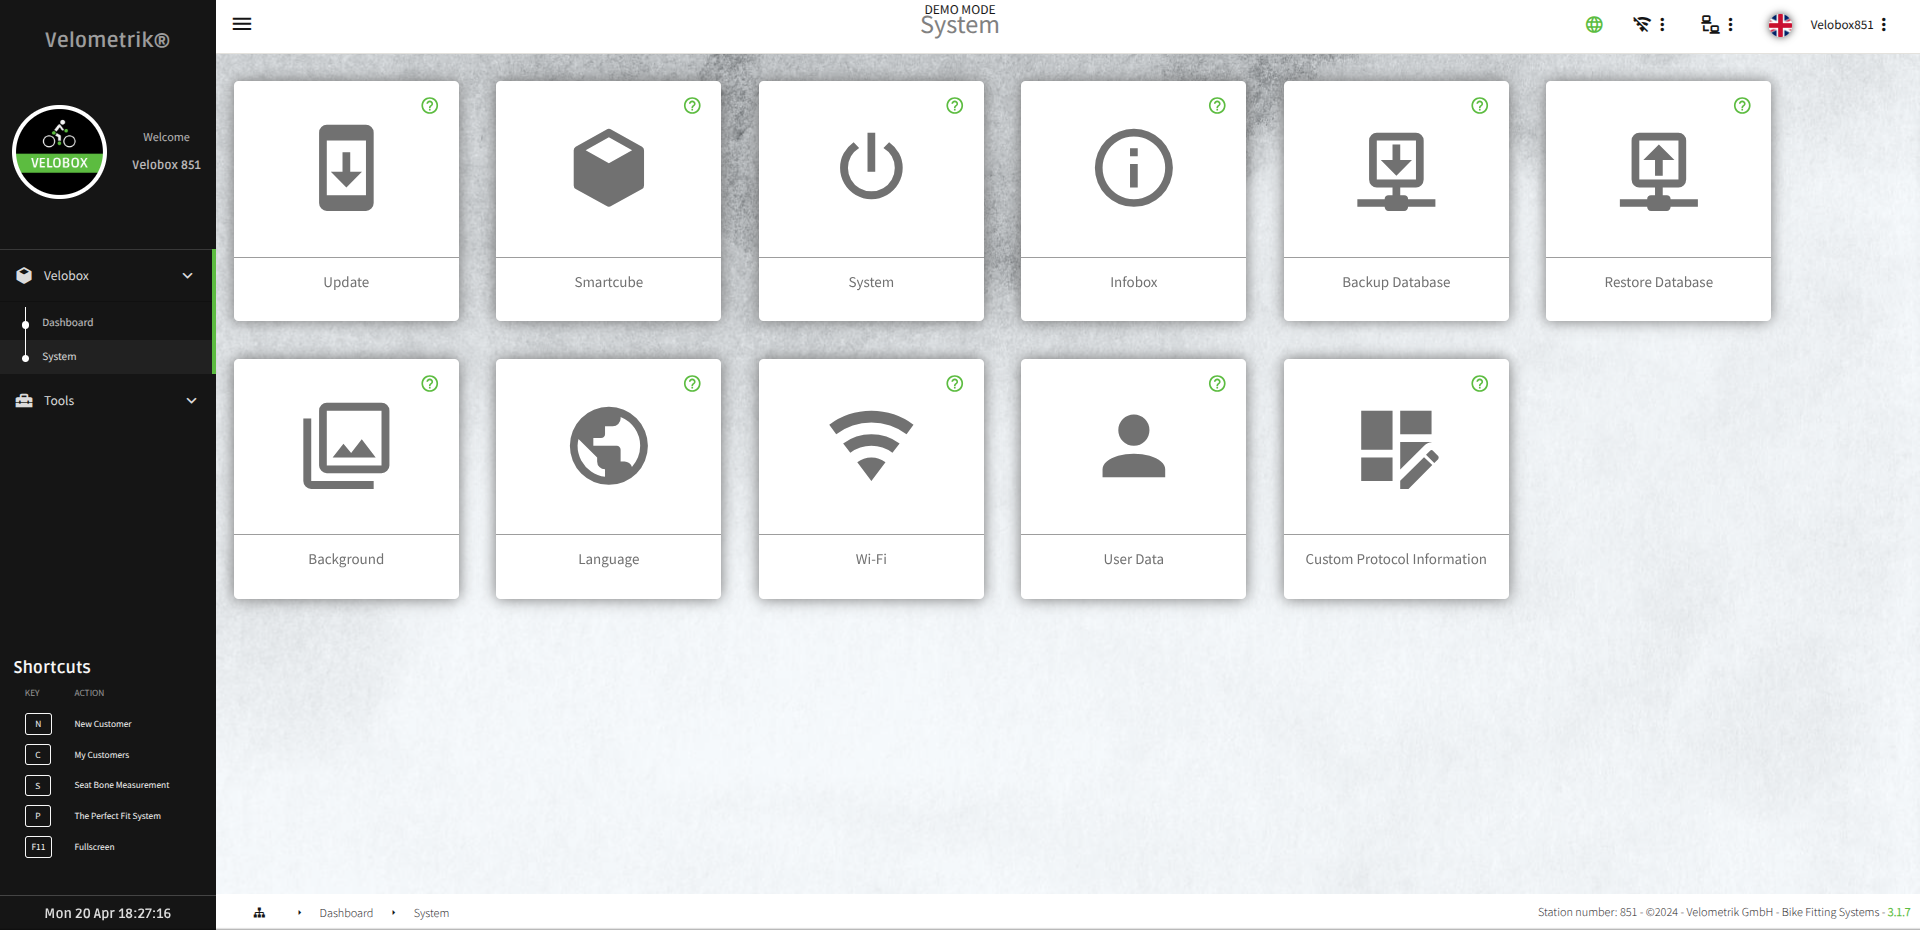
"System" looks like this
a) Add a client
Go to the dashboard and click on „New Client“. The required fields are first name and last name, noted by asterisks. The system automatically creates a date and time and you can optionally add an email. If you do so, the report will be mailed there in the end.
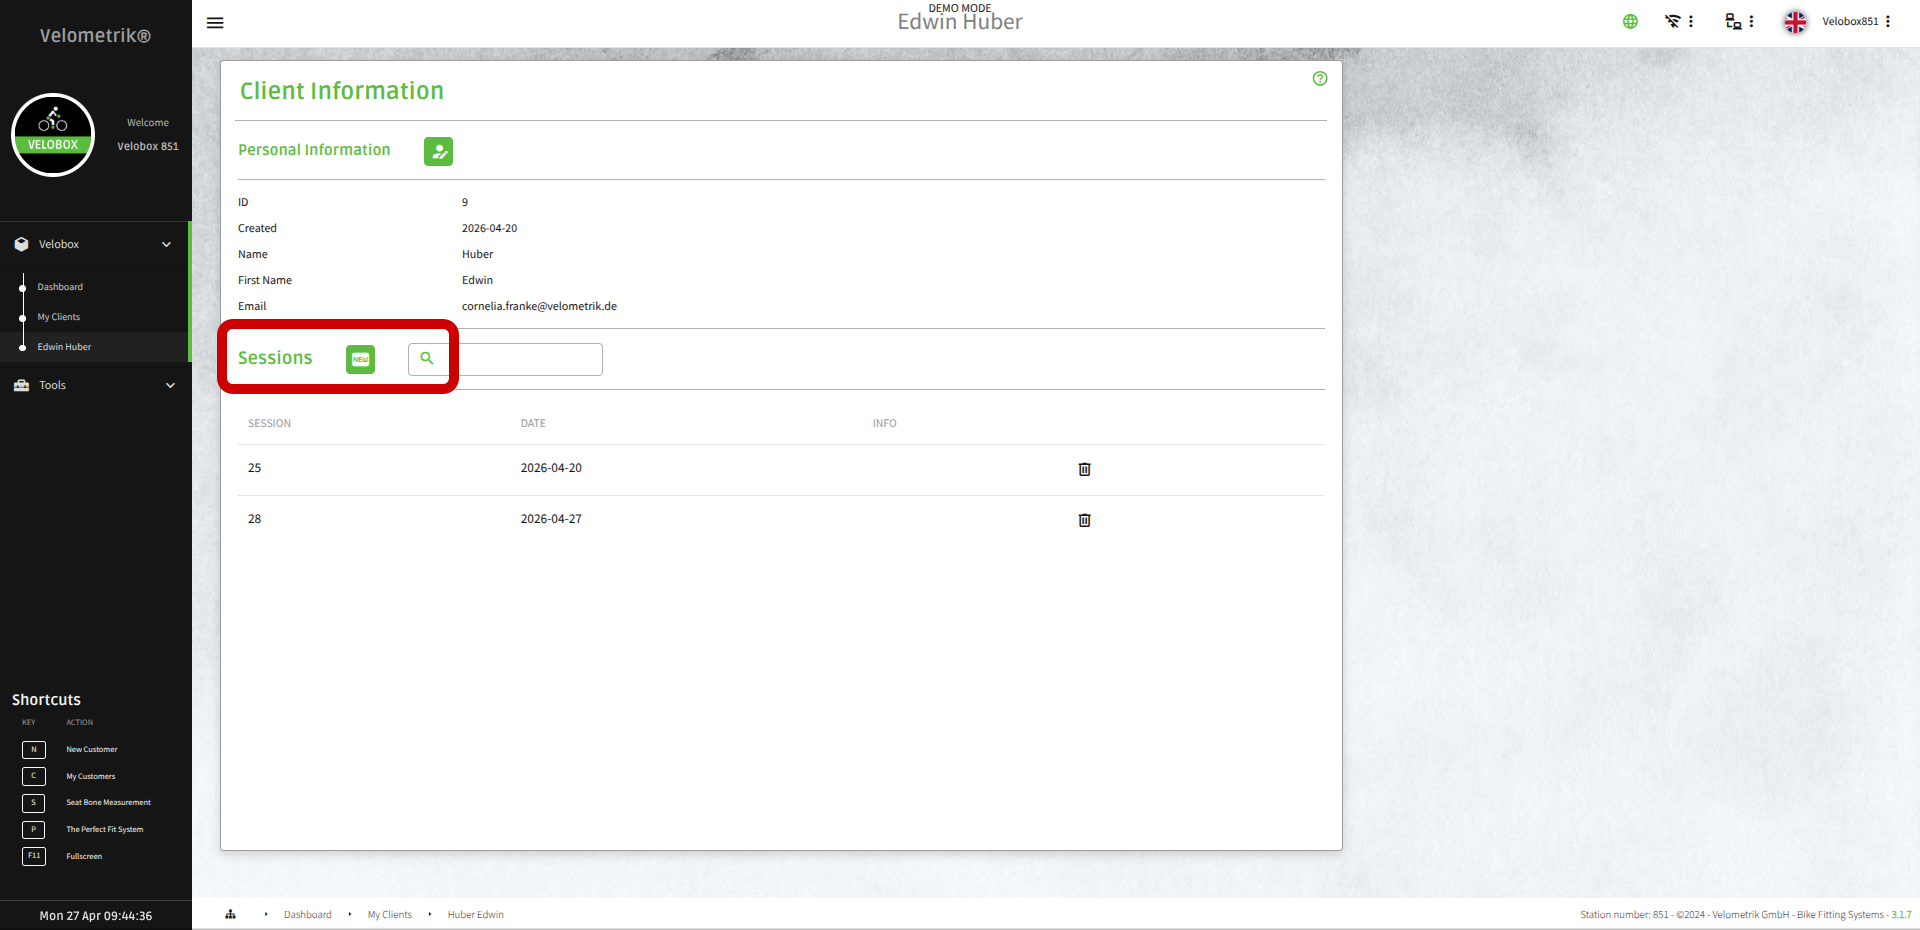
Clicking on the client opens up „Personal Information“ and „Sessions“. By clicking on the green NEW you start a new session. Use the dropdown-menues to enter whatever you know about the „Anamnesis“ of the client and the green arrow on the very right to save. Start your session.
b) Retrieve a client
Go to the dashboard ad click on My Clients. You see a list of clients already in the system. Click on the one you want to retrieve and then click on the session you want to retrieve. Choose whether you want to retrieve a protocol or gallery pictures or make a new session via „continue“.
The recording process is described under "4) Recording".
3) Pick or create a saddle mask
It saves you a lot of work to prune the SmartCover down to reflect the saddle size you’re using regularly and/ or to switch off pressure points deriving from the fold in the material or the likes.
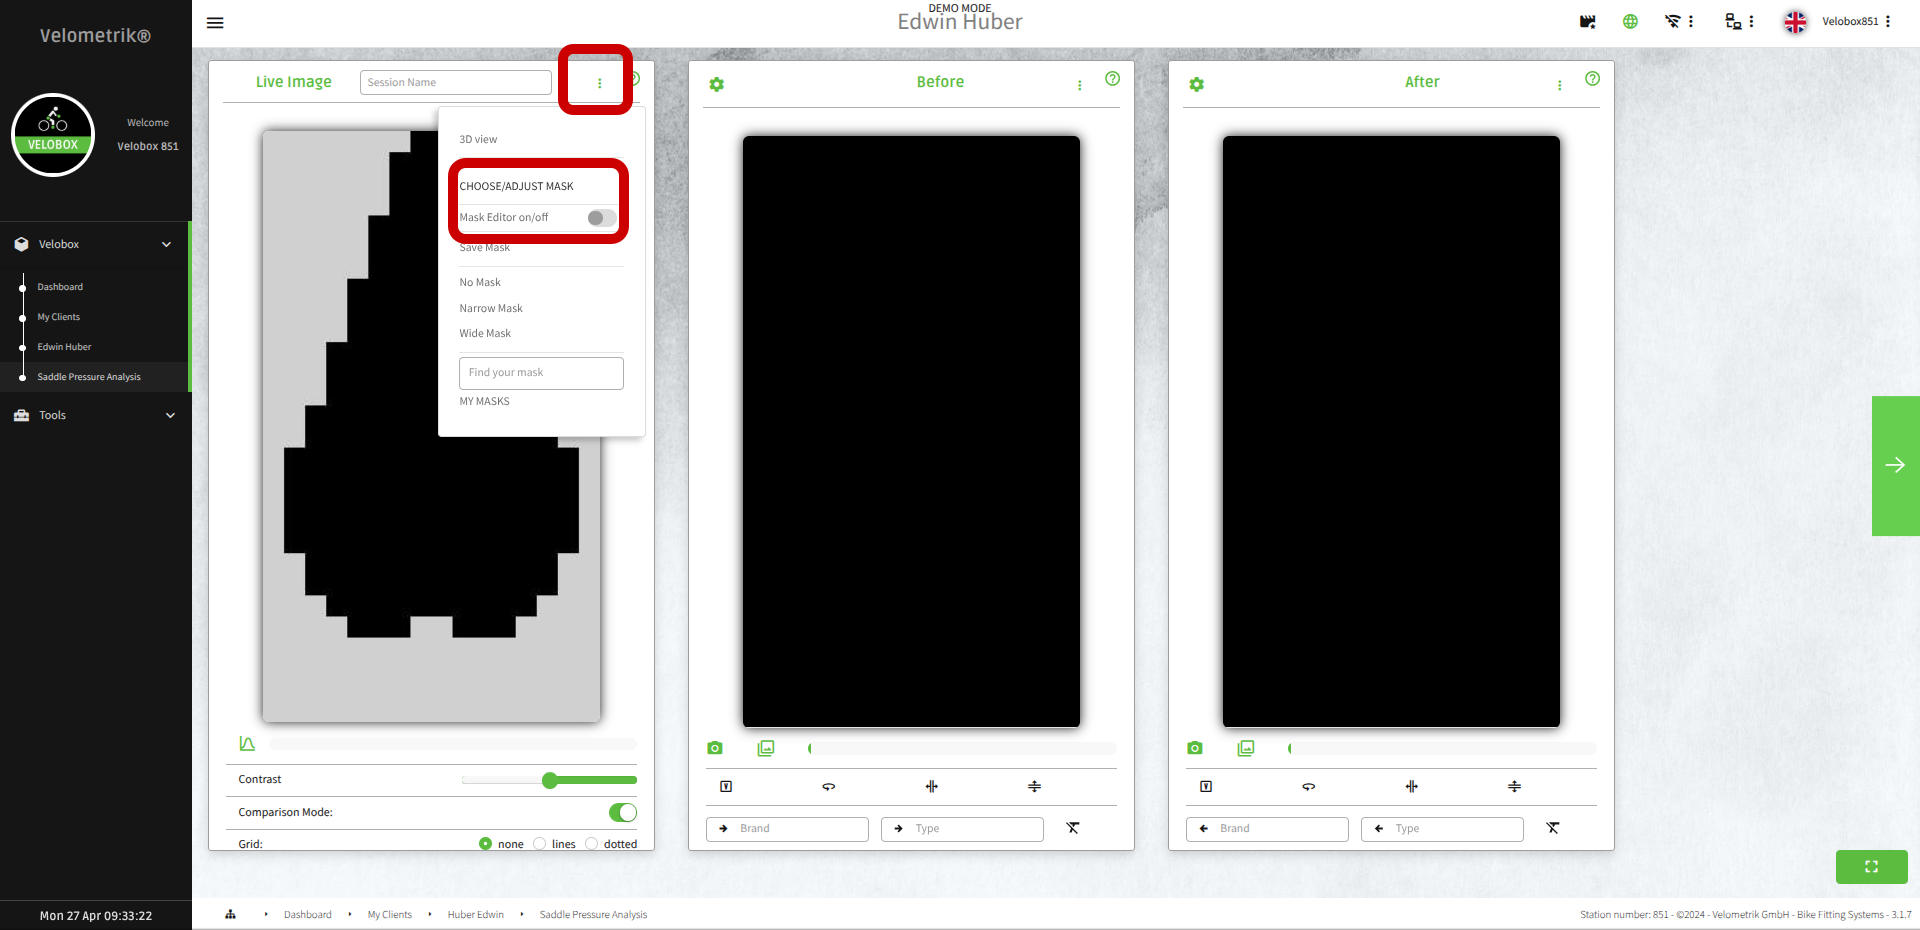
This is where you find the mask editor
Proceed like this:
a) turn the mask editor on by clicking on the three green dots on top right of the left screen and turn „Mask Editor on“
b) see the three defaults no mask, narrow mask, wide mask and use one of them (The pink dots you see are not recorded, the black dots are recorded.)
c) edit your own mask by turning on the mask editor, clicking on the dots you want to switch off and saving that mask for future usage. Give it a well defined name. It pays off to play around with mask editing a bit in the beginning. You can always delete the ones you do not want later on.
This is where you find the mask editor
The pink dots are not recorded now, only the black dots are. Click on the dots to switch them on and off and create your own saddle mask.
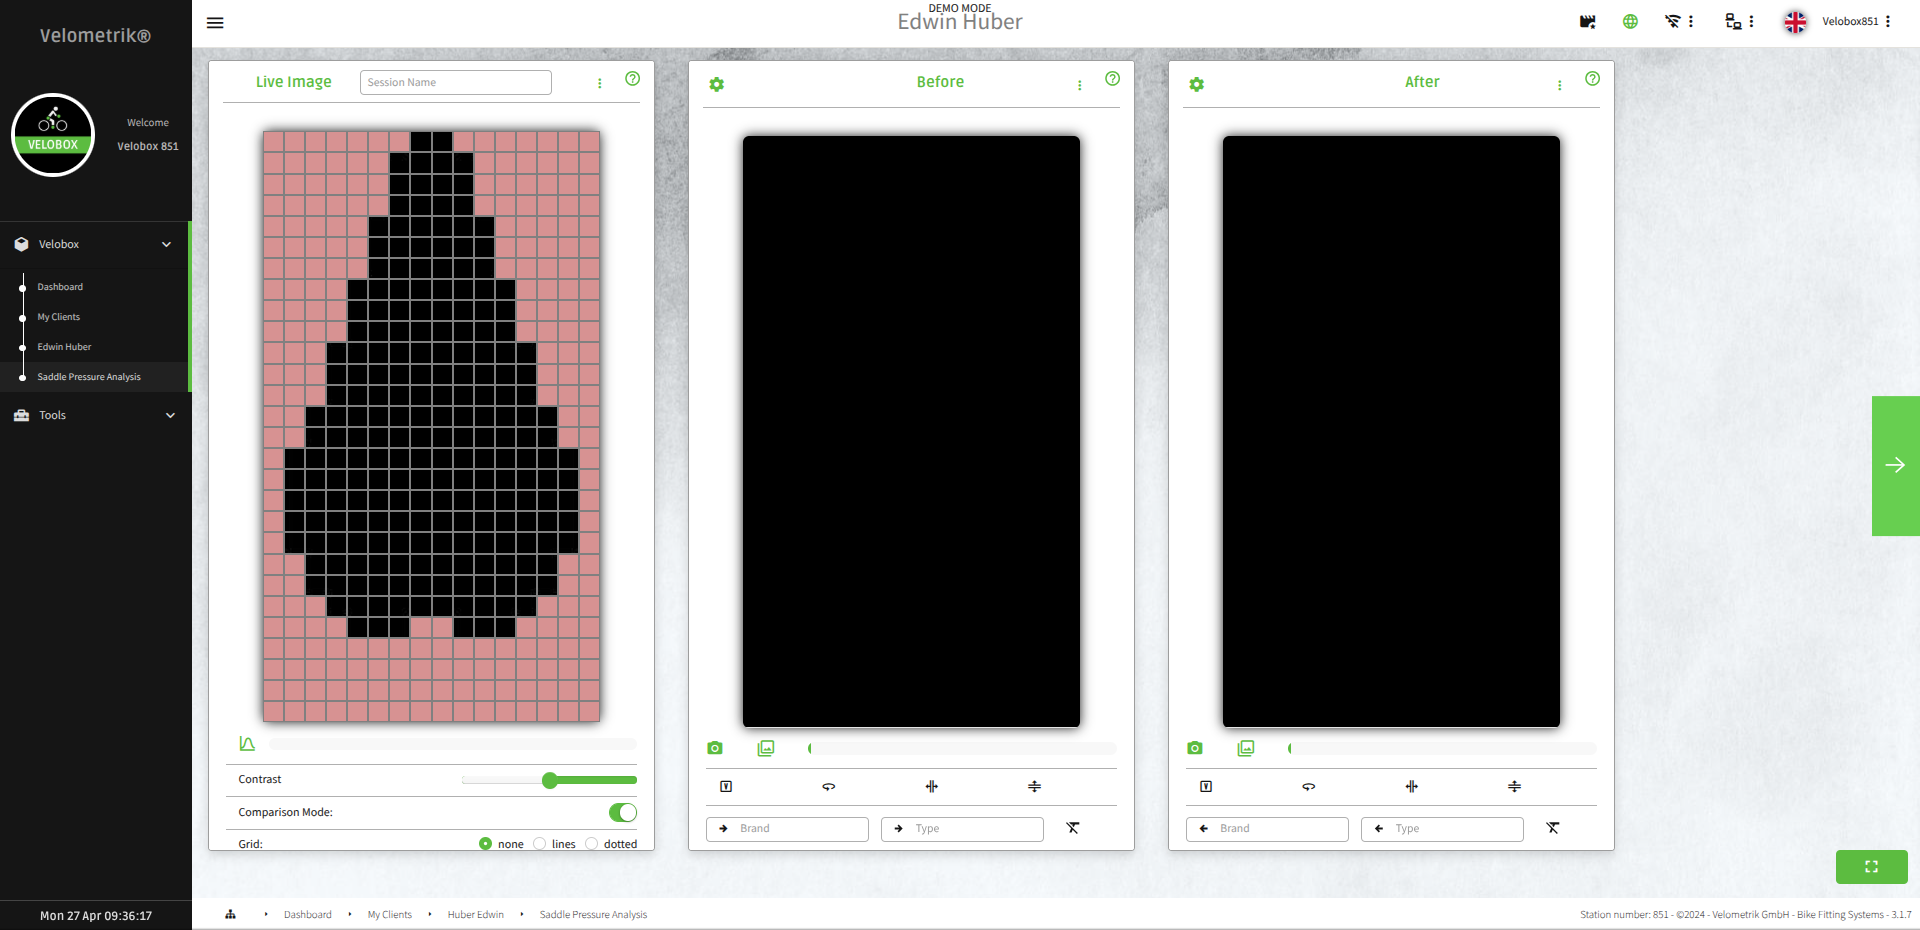
This is what the mask editor looks like
4) Recording
After entering a new client’s data or retrieving an old client’s data, you can start a NEW SESSION.
Click here to start a new analysis session
a) The next screen „Anamnesis“ gives you the option to enter some more data concerning this client. Click the green arrow on the right.
b) You see three display screens. Behind every green question mark there are explanations which are much more detailed than this manual and it pays off tho check them.
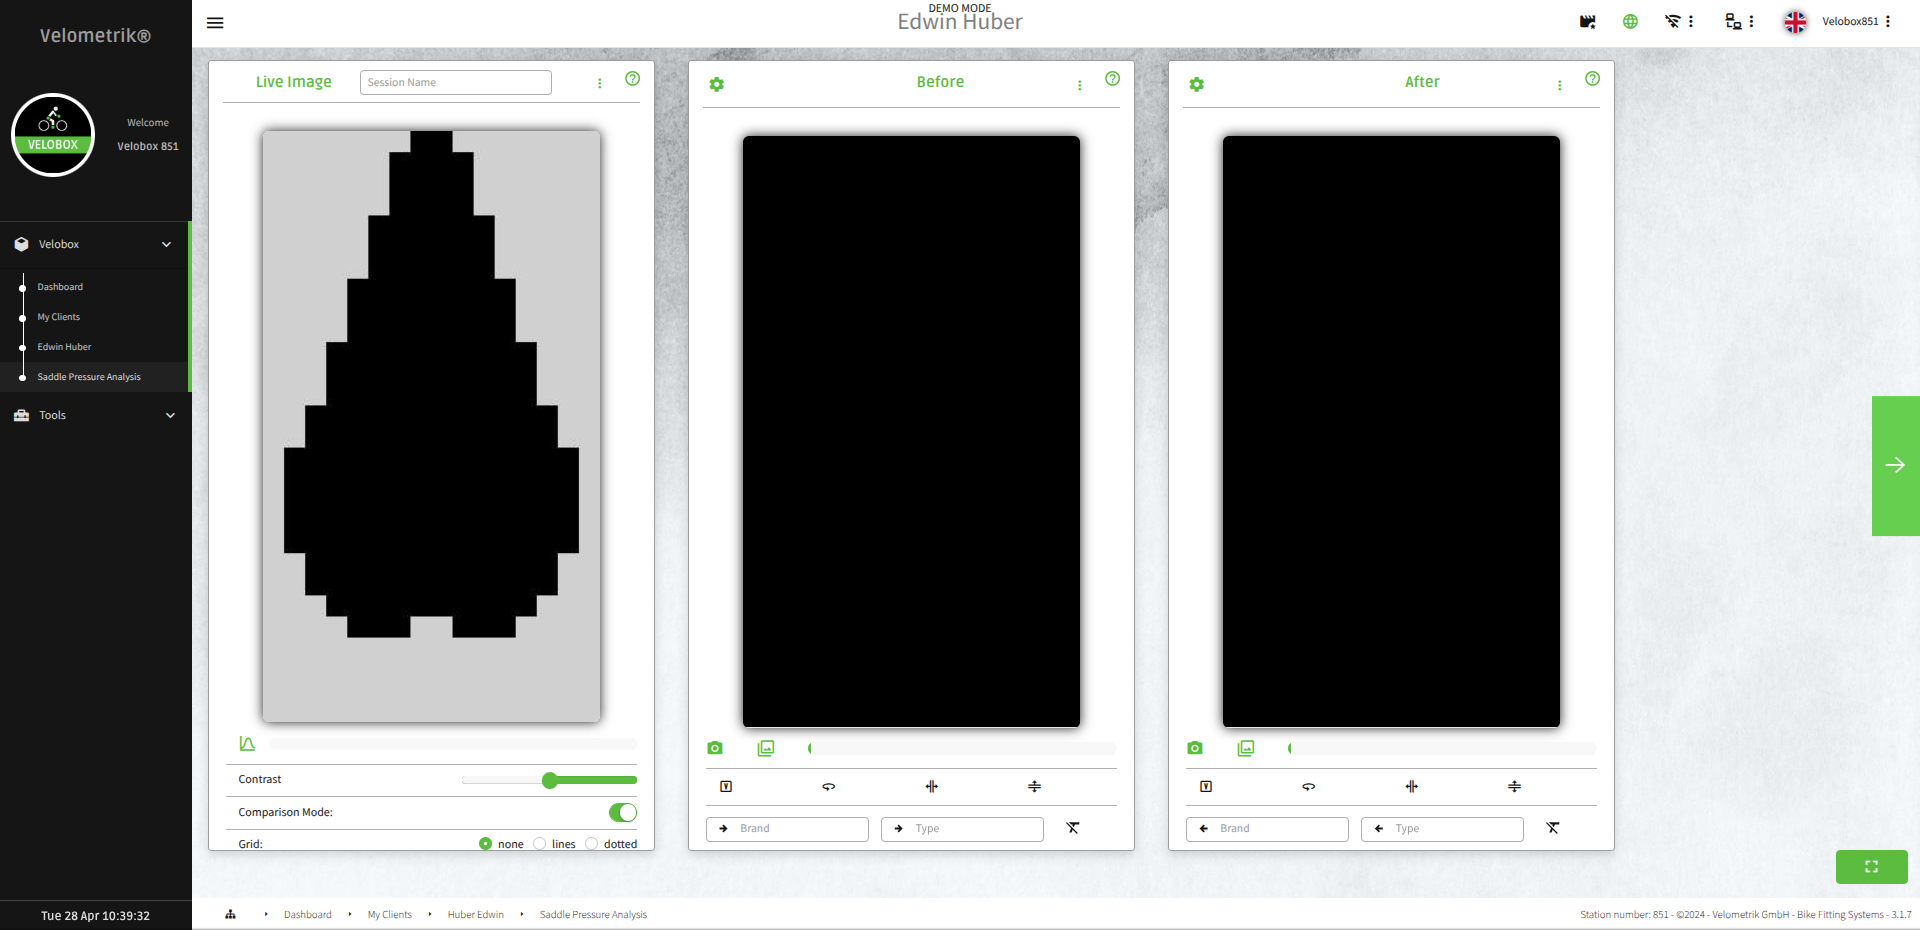
The three screens before you start recording
Basically, the screen to the left is the live data screen. You see the live pressure of someone pedaling. The other two are the recording screens with the middle screen for recording and the right side screen is recording again after you’ve made changes. Click on the green question marks for detailed informations on how to use them. Close to the green question marks, there are three dots with additional menu items for your work. On the top left of the two recording screens, there are wheels which offer more options for the recording and displaying. It pays off to get acquainted with all these a bit.
c) To record, hit the camera icon below the middle screen and start recording. First comes a countdown and then the recording interval starts. The length of the countdown and the recording can be changed by entering „settings“ behind the wheel top left of the recording screens. It is prudent to enter necessary informations to understand your recordings later! Aspects like the brand of the saddle, the model or information about the cycling position can be entered into the text box below the recording screen.
Take one or several pictures, analyse them and fit the bike. After this is done, you take one or several pictures with the right screen.
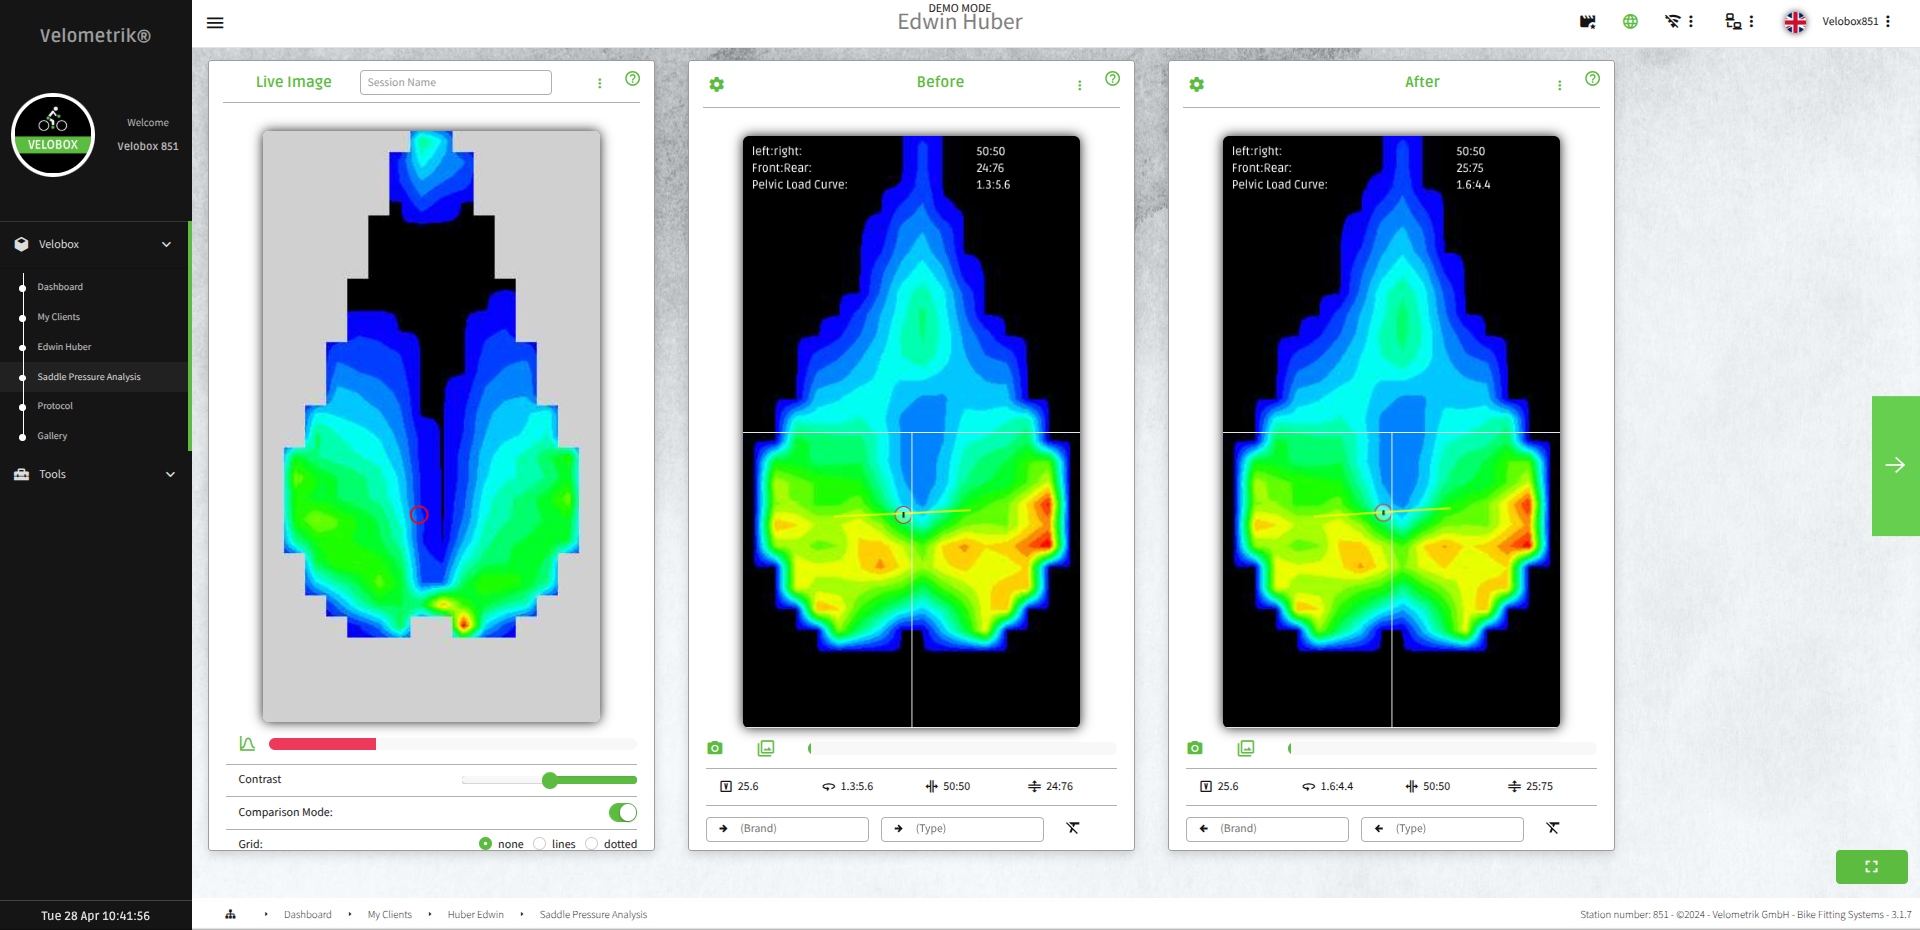
The three screens after you've started recording
To see all the taken pictures, go to „load“ behind the three dots on top of the recording screens. Pick one from „Before“ and one from „After“ the bike fit for the report. Click the green arrow to the right.
5) Reporting
You see a summary of all the details you’ve entered earlier about your customer and the two pictures you’ve selected. All features of the summary can be worked on by clicking the pen. Behind the three dots next to the pictures you find 3D-visualisations of them.
The protocol can be individualised by going to „Custom Protocol Information“ (three dots on the top right → system →Custom Protocol Information) and entering your own categories.
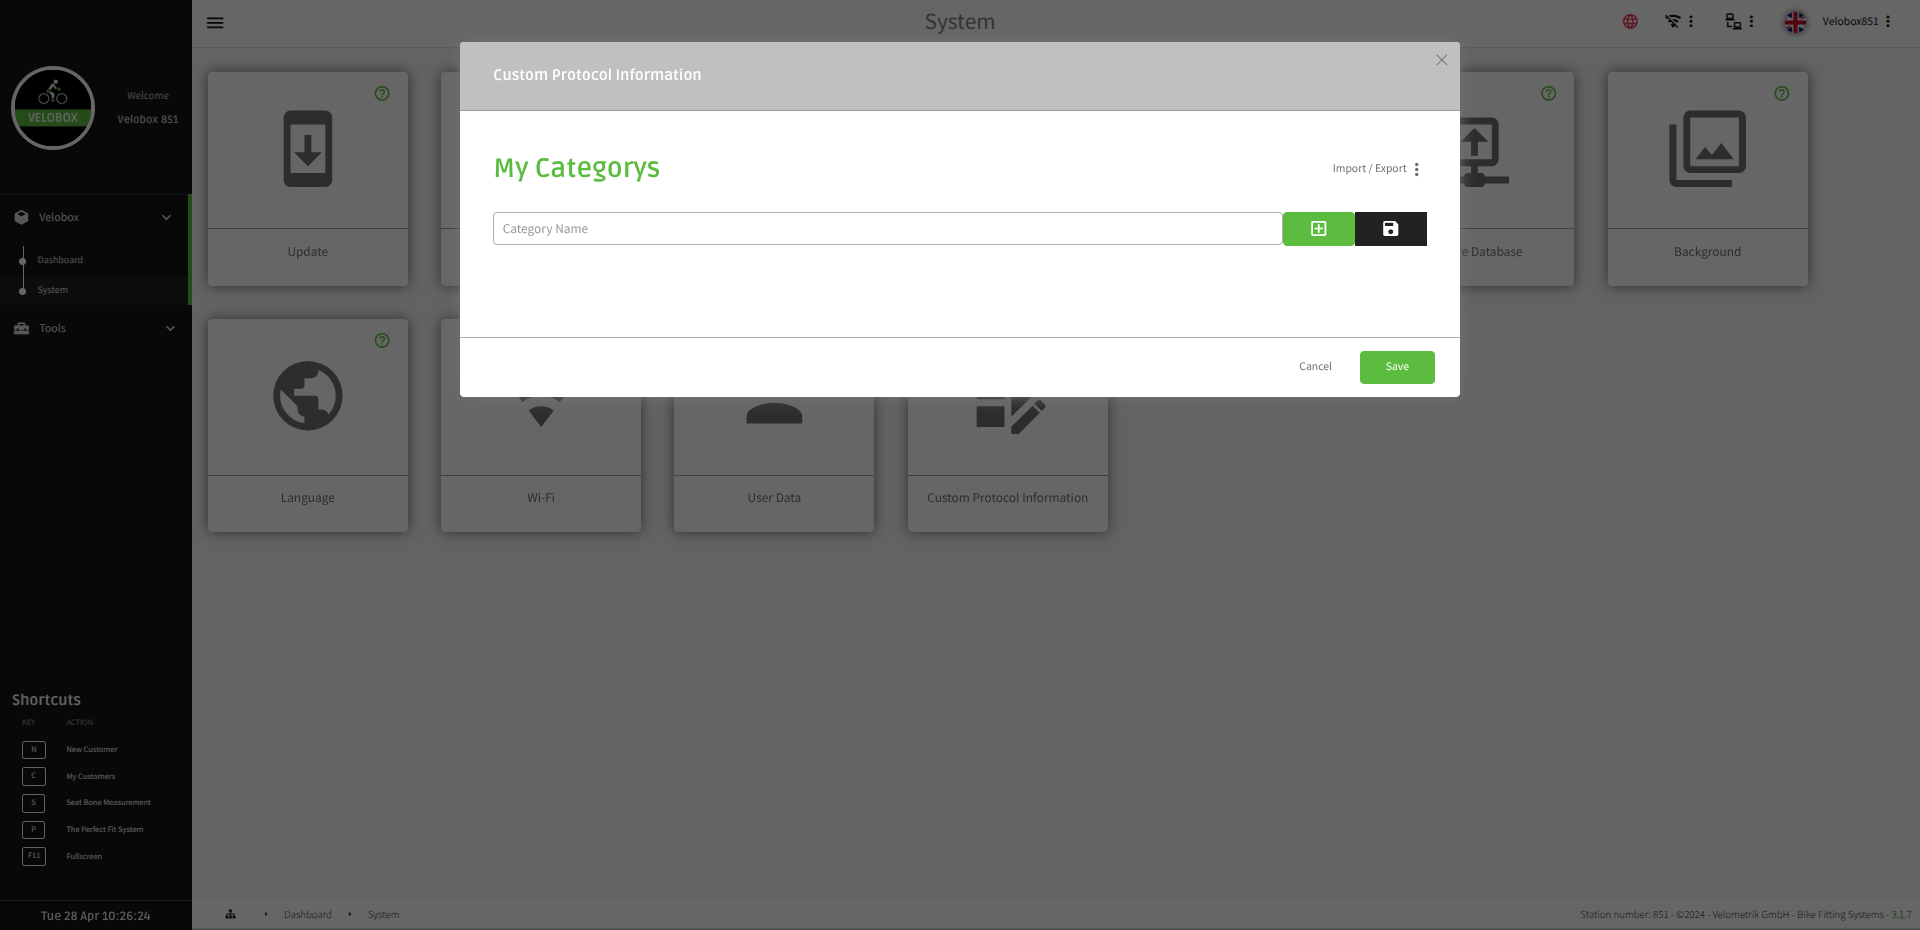
Create your own categories in "Customer Protocol Information"